
Bolted rail clip installation plays a key role in securing rails to their supporting structure. This method uses high-strength bolts and a mechanical clamping design to stop lateral movement, vertical lift, and vibration. It works with common rail types such as QU70–QU120, UIC 54, and ASCE 80. The system allows fast installation, simple adjustments, and easy maintenance on port cranes, steel mills, mining lines, and industrial tracks. Many projects prefer bolted clips because they avoid on-site welding and support high-precision work.
Tools and Pre-installation Checks
Before starting bolted rail clip installation, prepare a torque wrench, the correct spanner, a 1 kg hammer, and clean bolts and washers. Check each clip, washer, and rubber nose for defects. Confirm design dimensions and torque values from the product datasheet. Keep the rail support clean and free of debris.
Step-by-Step Bolted Rail Clip Installation
Insert Bolts
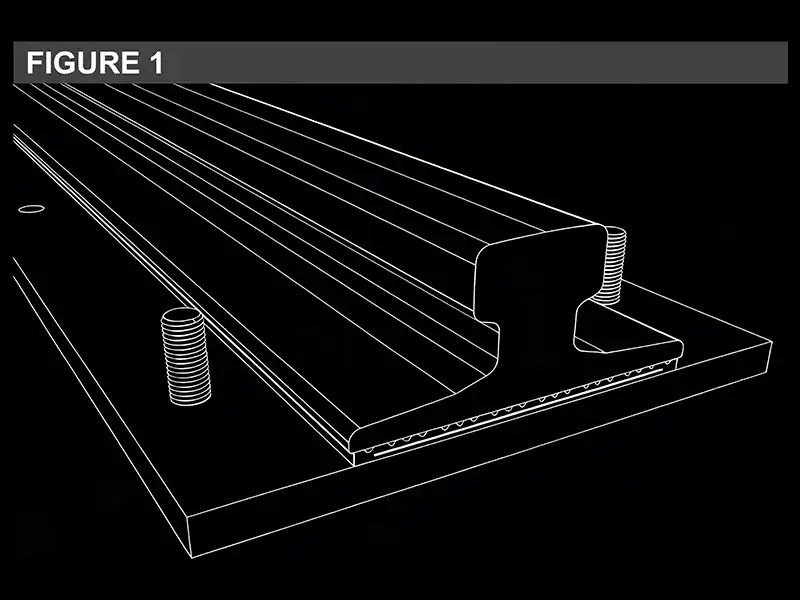
Insert the bolts through the holes in the rail supporting structure. Make sure each bolt sits straight.
Position the Clip

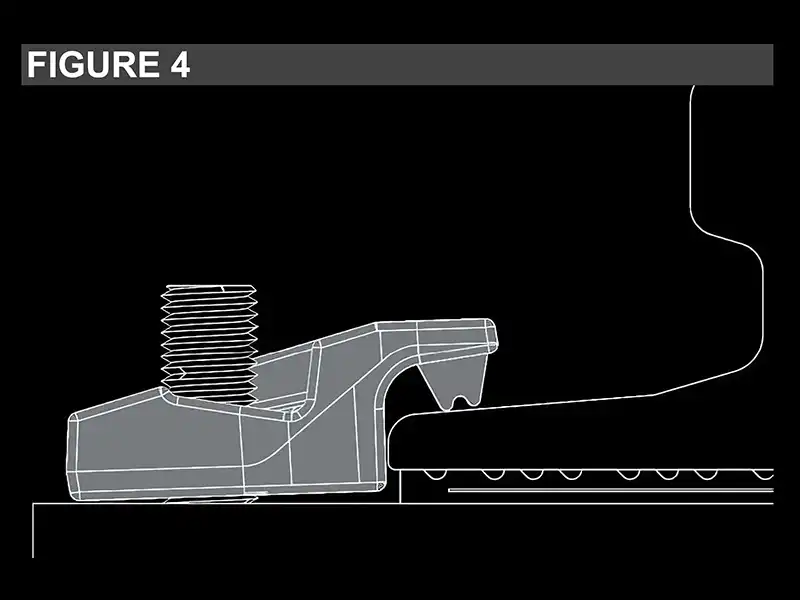
Place the clip body over the bolt. Set the rubber nose on the upper surface of the rail’s bottom flange.
Move Clip into Metal Contact

Slide the clip toward the rail until the metal faces make contact with the lower edge of the rail.
Confirm Initial Fit
Ensure the clip bottom is not yet in full contact with the support. This space is normal before tightening.
Place Special Washer

Put the special washer on the bolt. Keep the square corner facing the back and the flat face upward.
Check Washer Orientation

Confirm the washer sits flat and aligns correctly with the clip body.
Run Nut Down the Bolt
Thread the nut onto the bolt until it reaches the washer.
Make Nut Contact

Use a spanner and bring the nut into firm contact with the washer, but do not apply torque yet.
Tighten Nut (Initial Compression)

Tighten the nut until the rubber nose compresses and the clip bottom reaches metal-to-metal contact with the support.
Stop Before Final Torque

Do not apply full torque at this stage. The clip must be seated first.
Tap the Clip into Position

Use a 1 kg hammer to tap the clip body toward the rail along the slot direction. This action removes play and sets the final alignment.
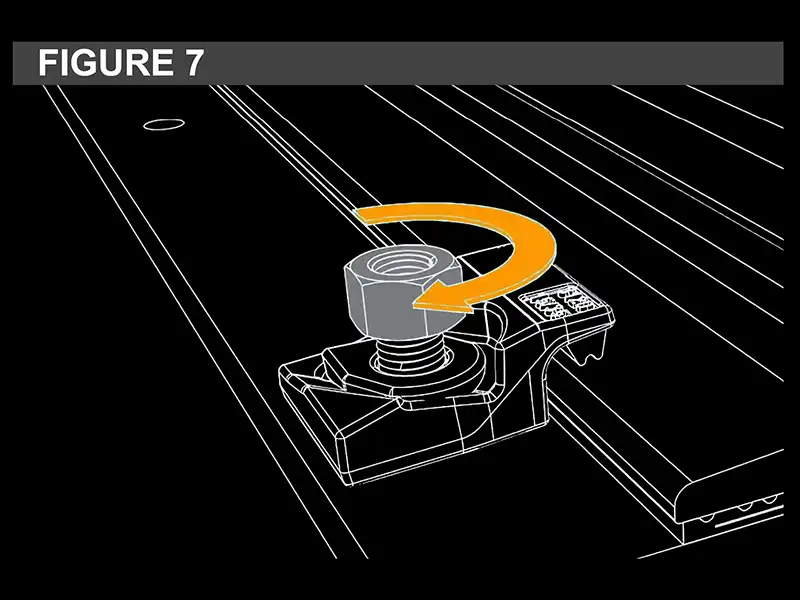
Apply Final Torque

Use a calibrated torque wrench and tighten the nut to the exact value shown in the product datasheet.
Safety Precautions
Wear a safety helmet, gloves, and goggles during bolted rail clip installation. Use only a calibrated torque wrench. Follow datasheet torque values and avoid over-tightening. After installation, check that each nut sits firmly on the washer, and confirm final alignment with a visual inspection.
Maintenance and Care
Inspect each rail clip at least once every quarter. Clean dust and debris around the clip and apply anti-corrosion lubricant to bolt threads. Replace rubber noses when wear exceeds 3 mm. Replace bolts or clips with any sign of rust, deformation, or cracking. Shorten maintenance intervals in humid or corrosive environments.
What We Provide for Your Project
We manufacture bolted rail clips with high-strength alloy steel and durable rubber. Each batch passes ISO-based torque and durability testing. We offer many clip types for global rail standards and support clients with installation guidance and technical documentation. Our products serve ports, rail systems, industrial tracks, and mining operations worldwide.
Next Steps for a Reliable Rail Installation
Standardized bolted rail clip installation ensures a stable track system and reduces long-term maintenance costs. If you need a custom installation plan for port cranes, corrosive environments, or heavy-load operations, contact Glory Track for expert support.